Welcome back to another chapter in the blog series Big Little Things, where we highlight some of the lesser-known and sometimes overlooked features and enhancements in Vtiger CRM that pack a big punch. This post highlights the Merge Tags feature, which allows users to pull in field values from related records directly into Print Templates and Email Templates. Let’s dive in and learn more about this feature.
What Are Merge Tags?
Merge tags can be applied to Print Templates or Email Templates and are used as placeholders in the template. Merge Tags auto-populate with data, often from fields, once the templates are applied to a record or when an email is sent. When creating Email Templates or Print Templates users can apply Merge Tags to these templates to ensure they are adding personalized touches and/or pulling in relevant data to the templates they create.
Use Cases
There are almost endless ways Merge Tags can be used to automate the process of adding personal details or relevant information into the body of Email Templates and Print Templates. Below are two examples highlighting some common ways in which Merge Tags are used by our customers:
Email Templates
When creating an Email Template that is intended to send to multiple recipients or to be used in an Email Campaign, users can personalize the email by using the “Contact: First Name” Merge Tag. This will automatically pull the Contact’s First Name into the body of the email for all the intended recipients. This makes it possible to personalize emails regardless of the number of recipients.

Print Templates
When creating Print Templates for Quotes, Sales Orders, Invoices, etc.… Users can apply Merge Tags to the Template that will ensure all relevant and important information is applied to the document. Let’s use an Invoice Print Template as an example.
When you look at a default Invoice Print Template in Vtiger, you will see that the majority of the Template is filled using Merge Tags.
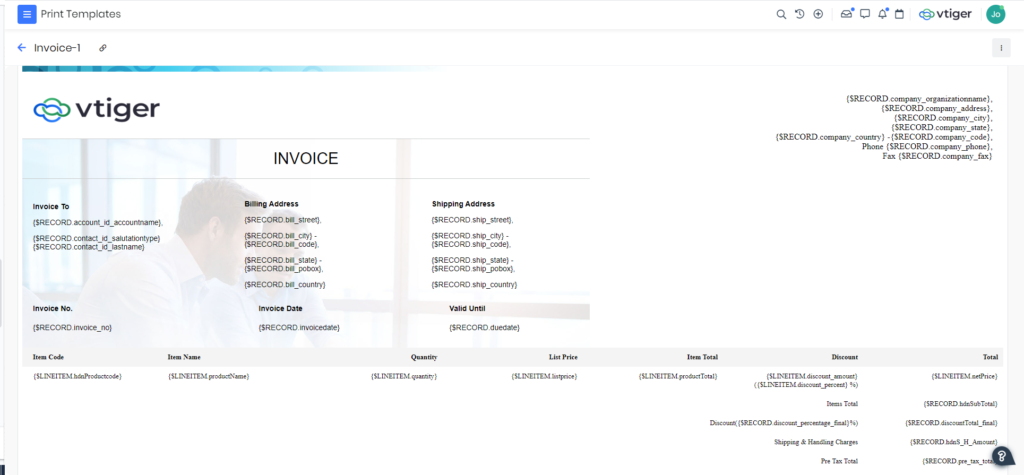
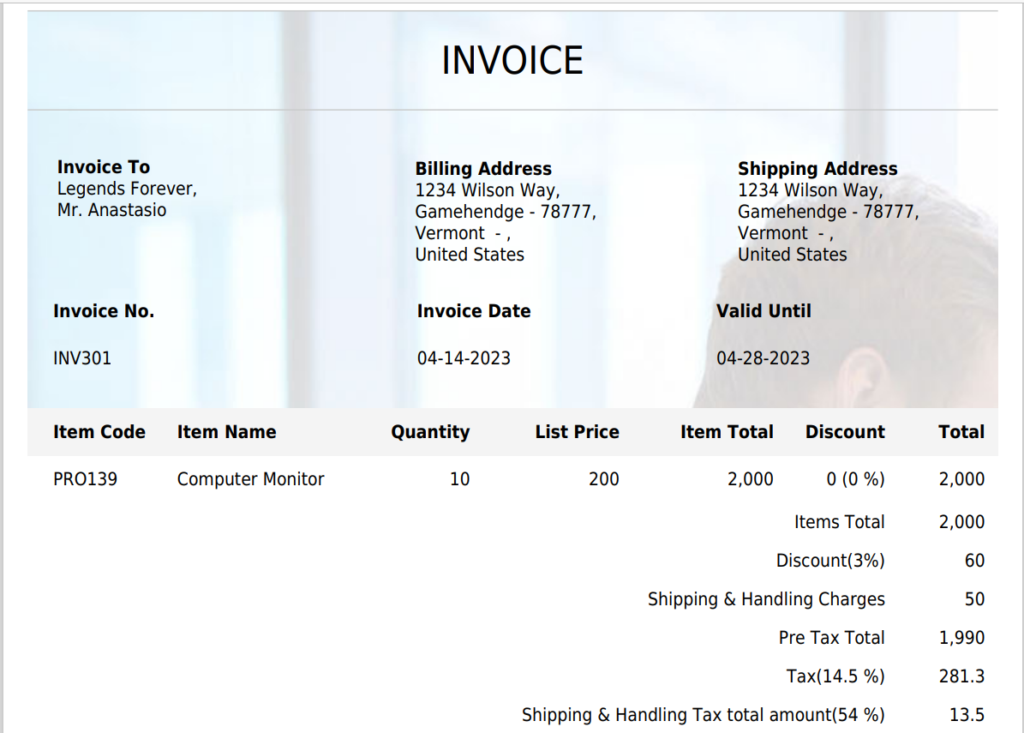
These Merge Tags automatically pull record data into the Print Template such as information belonging to the related Organization and Contact, and details from the Invoice record itself. Below, is how this Invoice Template looks once the Template is applied to an Invoice record and is ready to be sent off to the customer:
How to Use Merge Tags in Email Templates
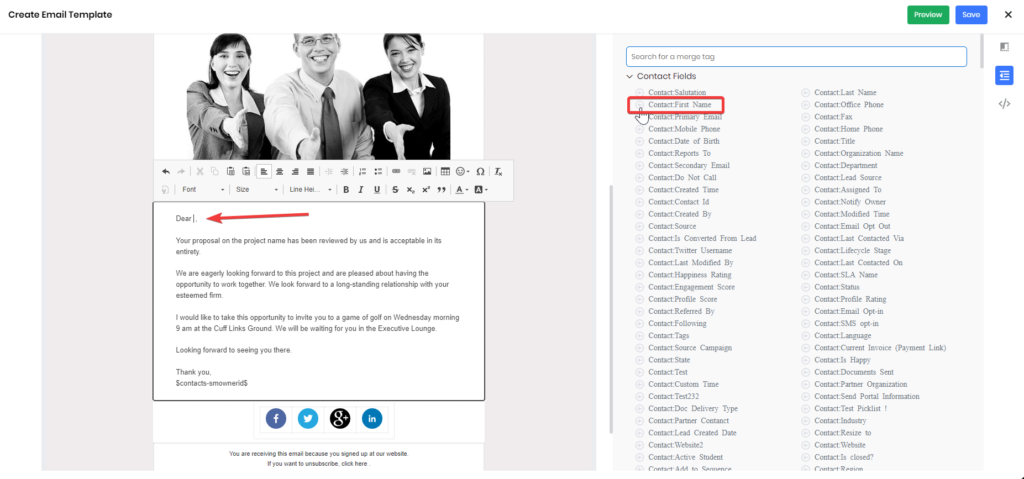
When creating or editing an Email Template, simply click on the Merge Tags button to display all of the Merge Tags available to use.
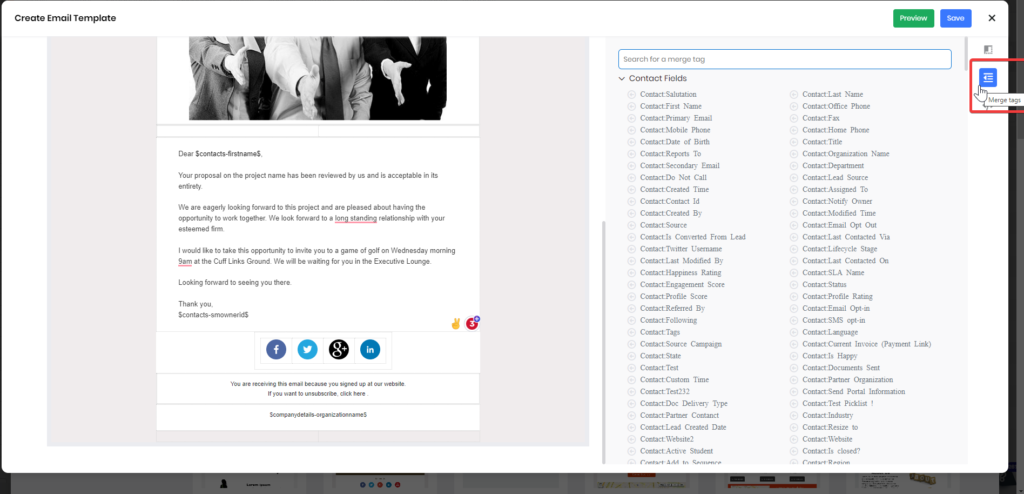
Next, the user can search for the Merge Tag associated with the relevant field that they would like to apply to the Template, by either scrolling through the list of available merge tags or by using the search box.
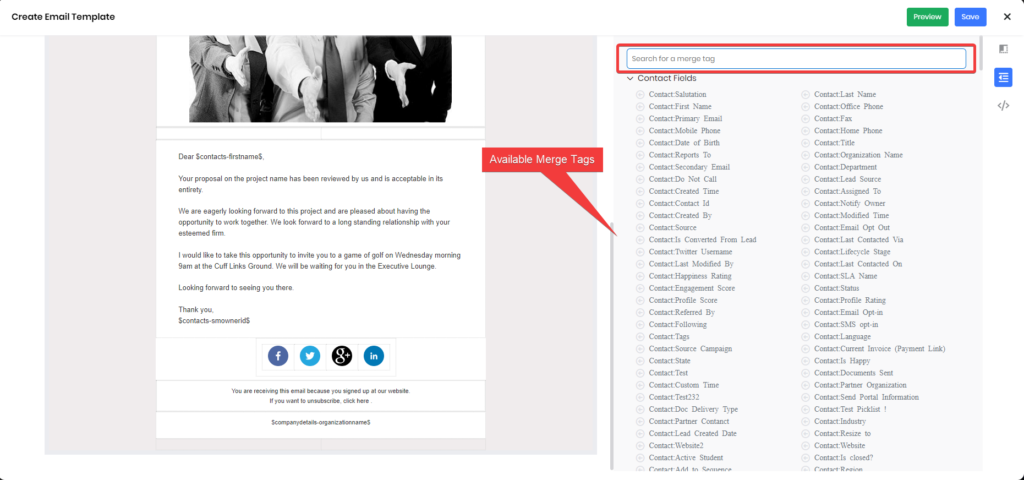
To insert the Contact’s First Name (Field) into the body of the email, simply place the mouse cursor in the desired spot on the body of the Email Template and click on the “Contact: First Name” Merge Tag.
How to Use Merge Tags in Print Templates
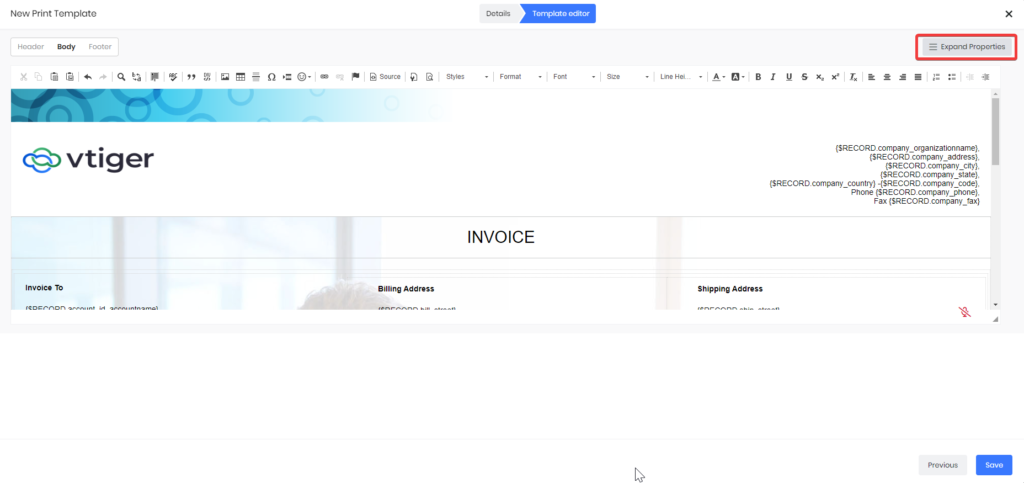
When creating or editing a Print Template and on the Template editor page, click on the “Expand Properties” button in the upper right-hand corner of the screen.
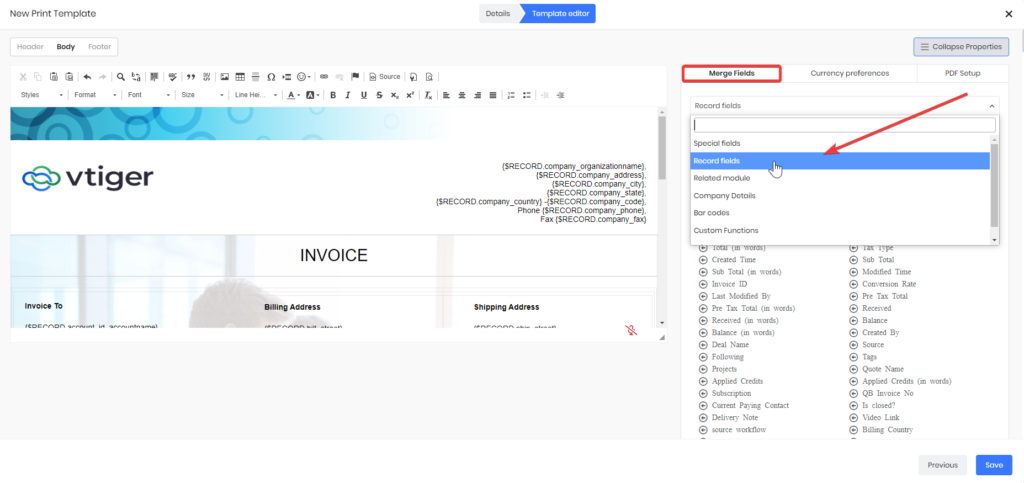
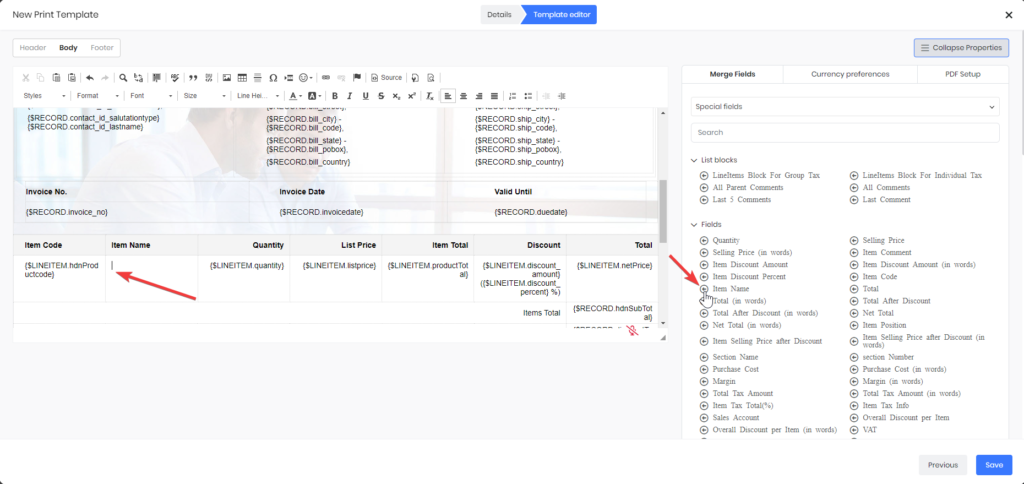
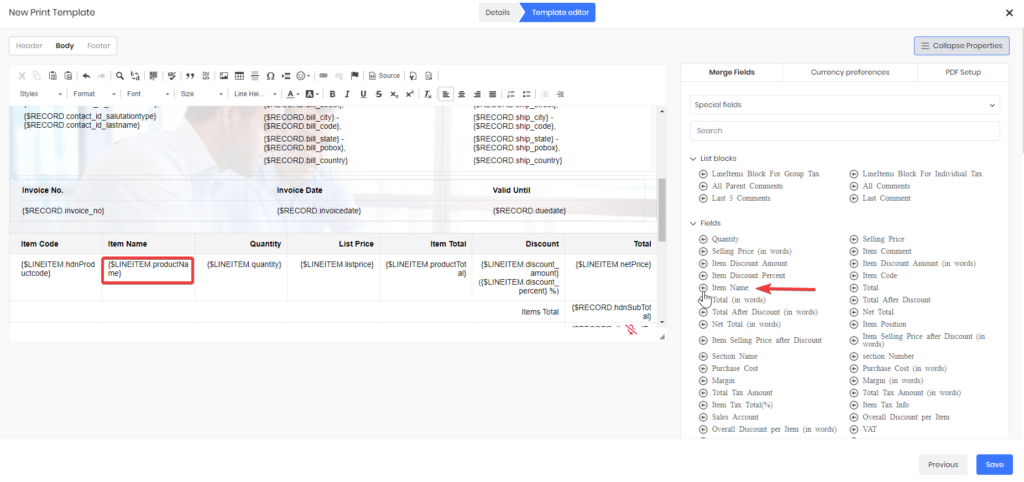
Next, users can select the “Merge Fields Tab” and select the type of fields from which they would like to select.
Lastly, just like when applying Merge Tags to an Email Template, users can search for the Merge Tag associated with the relevant field that they would like to apply to the Template by either scrolling through the list of available merge tags or by using the search box.
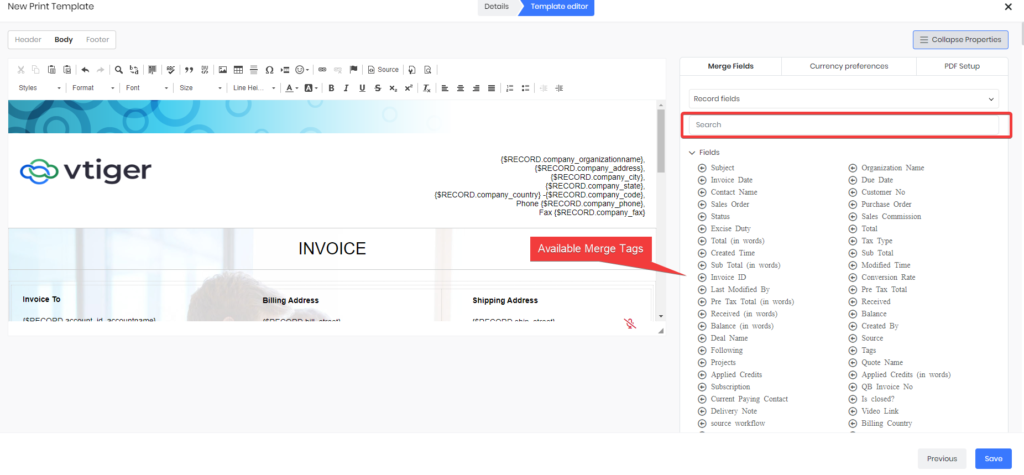
Lastly, users can apply the Merge Tag to the Print Template by placing the mouse cursor in the desired spot on the body of the Print Template and clicking on the Merge Tag.
Using Merge tags on Email Templates and Print Templates is a powerful way to automate the input of Record data into the body of your Templates. Merge Tags will not only save valuable time for users but will provide users with a consistent and personalized format that will delight their customers.
| Take Vtiger for a Test Drive Today Click here to sign up for a 15-day free trial or try our forever free Pilot edition. |
